Create a Sqoop job
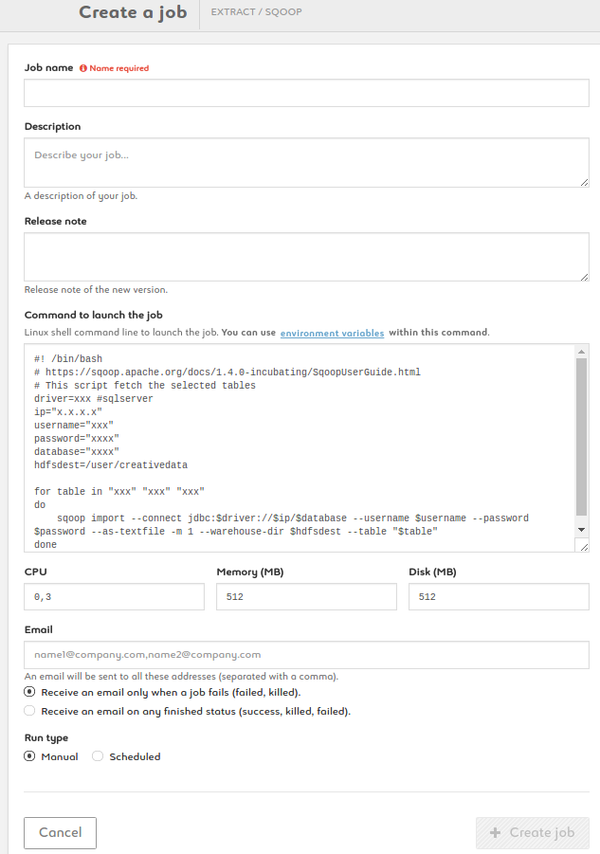
1. Name your job, add description and release note
2. Type your command using the ready-to-use template provided. Add environment variables as $VARIABLE or access your variable library by clicking the link
3. Set your CPU, memory and disk settings
4. Enter one or more e-mail addresses to be alerted on the status of the job
5. Run your job manually or set up a schedule
Create a Talend job
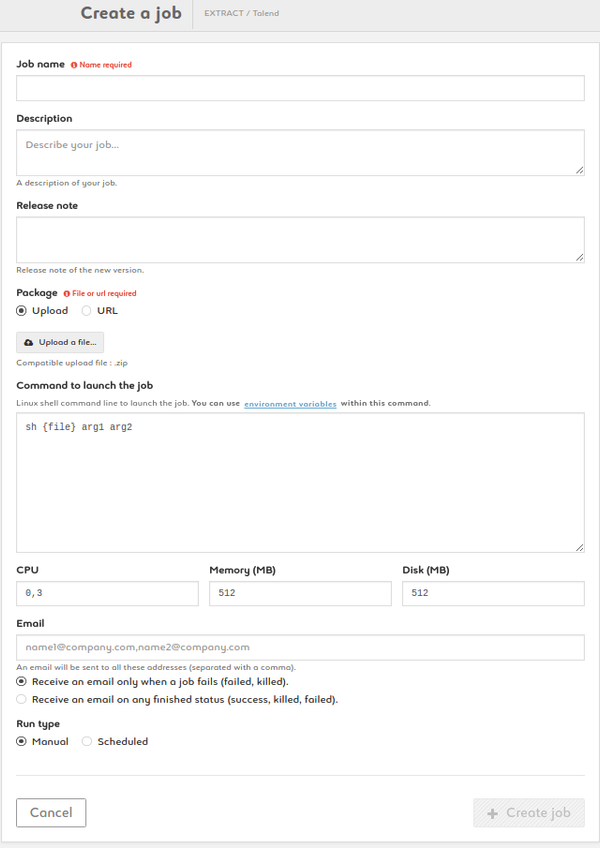
1. Name your job, add description and release note
2. Add a package by uploading a zip of by entering a URL
3. Type your command. {file} is a parameter (don't change it). Customize arg1, arg2, etc. Add environmnent variables as $VARIABLE or access your variable library by clicking the link
4. Set your CPU, memory and disk settings
5. Enter one or more e-mail addresses to be alerted on the status of the job
6. Run your job manually or set up a schedule
Create a Java/Scala job
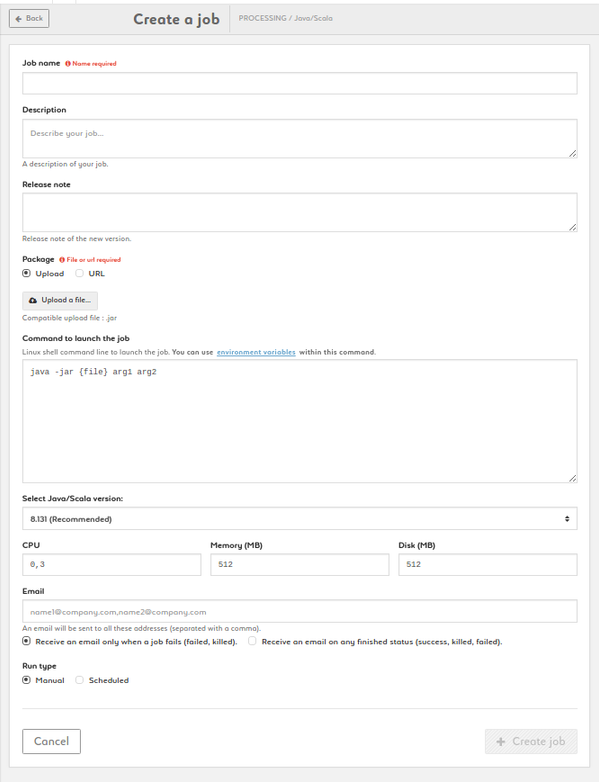
1. Name your job, add description and release note
2. Add a package by uploading a jar of by entering a URL
3. Type your command. {file} is a parameter (don't change it). Customize arg1, arg2, etc. Add environmnent variables as $VARIABLE or access your variable library by clicking the link
4. Choose the language version: JAVA 8 (recommended) or JAVA 7
5. Set your CPU, memory and disk settings
6. Enter one or more e-mail addresses to be alerted on the status of the job
7. Run your job manually or set up a schedule
Create a R job
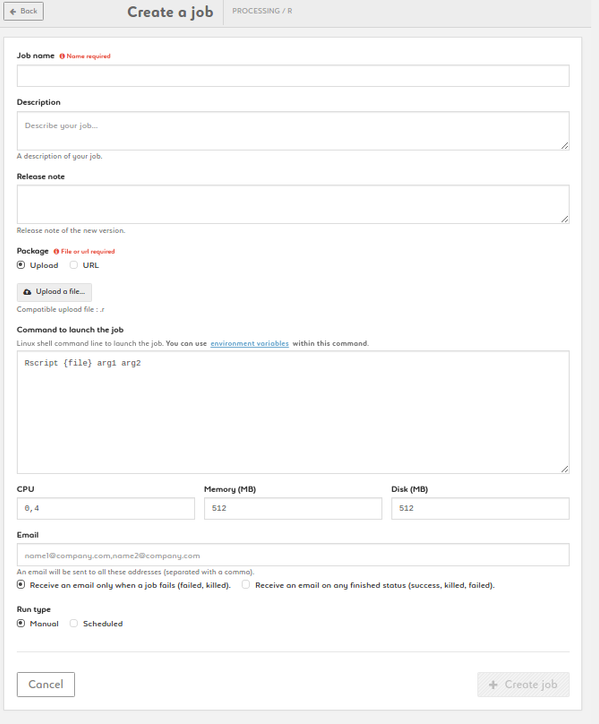
1. Name your job, add description and release note
2. Add a package by uploading a R file of by entering a URL
3. Type your command. {file} is a parameter (don't change it). Customize arg1, arg2, etc. Add environmnent variables as $VARIABLE or access your variable library by clicking the link
4. Set your CPU, memory and disk settings
5. Enter one or more e-mail addresses to be alerted on the status of the job
6. Run your job manually or set up a schedule
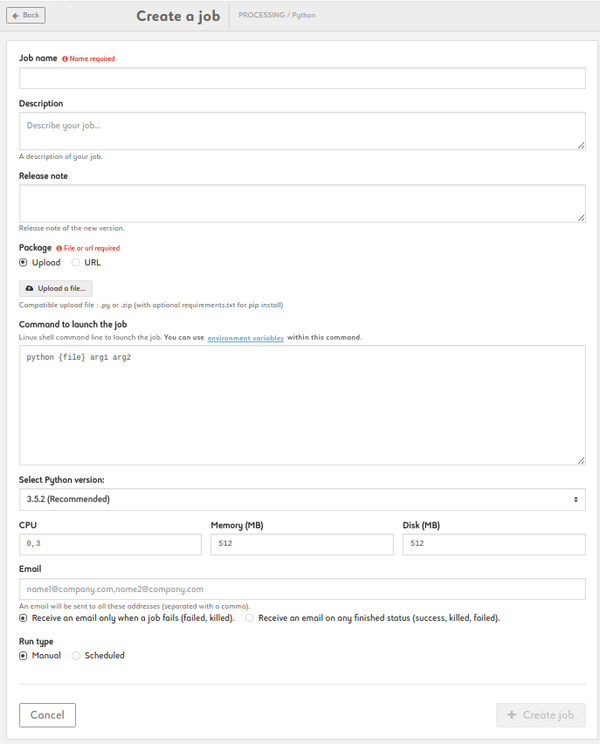
Create a Python job
1. Name your job, add description and release note
2. Add a package by uploading a file of by entering a URL. Files may be a .py or a zip archive with at least a file named __main__.py inside. In zip archives, you can provide a requirements.txt if you need external packages
3. Type your command. {file} is a parameter (don't change it). Customize arg1, arg2, etc. Add environmnent variables as $VARIABLE or access your variable library by clicking the link
4.Select Python version (2.7 or 3.x)
5. Set your CPU, memory and disk settings
6. Enter one or more e-mail addresses to be alerted on the status of the job
7. Run your job manually or set up a schedule
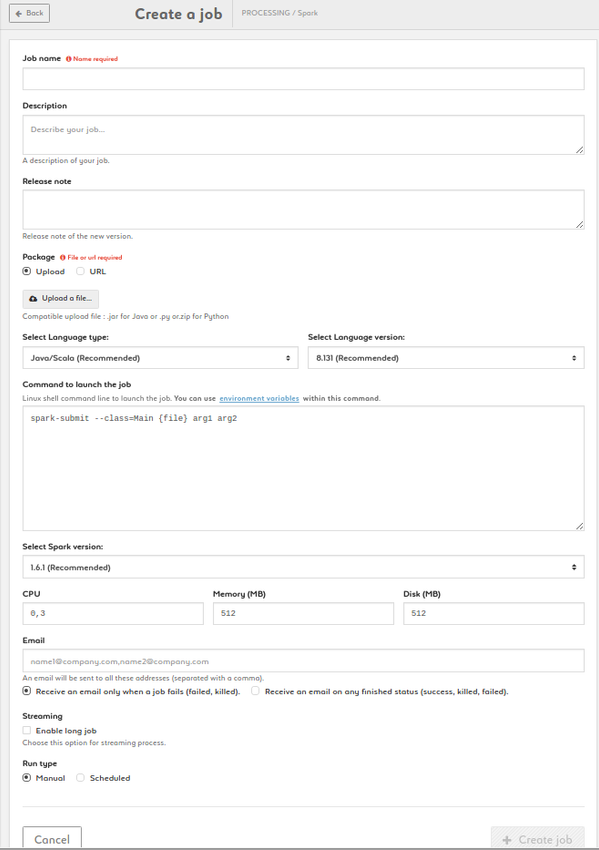
Create a Spark job
1. Name your job, add description and release note
2. Add a package by uploading a jar of by entering a URL
3. Type your command. {file} and {driver_options} are parameters (don't change it). Customize arg1, arg2, etc. Add environmnent variables as $VARIABLE or access your variable library by clicking the link
4. Choose the language type and version between Java/Scala (8.131 recommended or 8.121) and Python (2.5.2 recommended or 2.7.13)
5. Choose the Spark version: 1.6.1 is recommended but 1.5.2 , 2.0.2 and 2.1.0 are also available
6. Set your CPU, memory and disk settings
7. Enter one or more e-mail addresses to be alerted on the status of the job
8. Enable the streaming option in case of streaming process
9. Run your job manually or set up a schedule
Create a Datascience Notebook
- Name your job, add description and release note
- Choose the notebook: Python 2 & 3, Python / Spark 2.1.0 , R, Scala / Spark 1.6.1, Scala / Spark 1.5.2, R, Ruby, Haskell, Julia
- Set your CPU, memory and disk settings
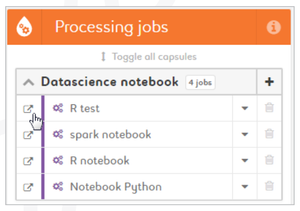
Access a Datascience Notebook
1. Click on the "Open in new window" icon next to a notebook
