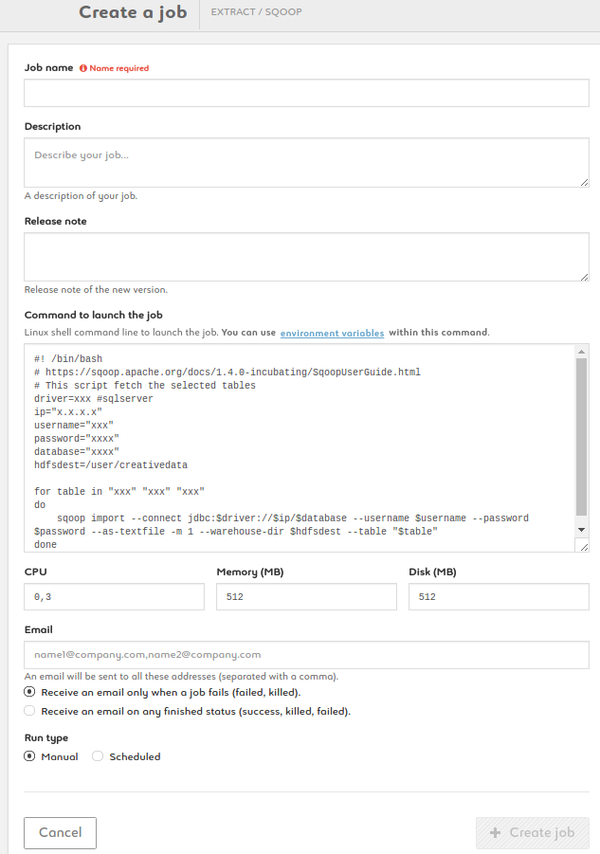
Create a Sqoop job
1. Name your job, add description and release note
2. Type your command using the ready-to-use template provided. Add environment variables as $VARIABLE or access your variable library by clicking the link
3. Set your CPU, memory and disk settings
4. Enter one or more e-mail addresses to be alerted and to get the status at the end of the job
5. Run your job manually or set up a schedule
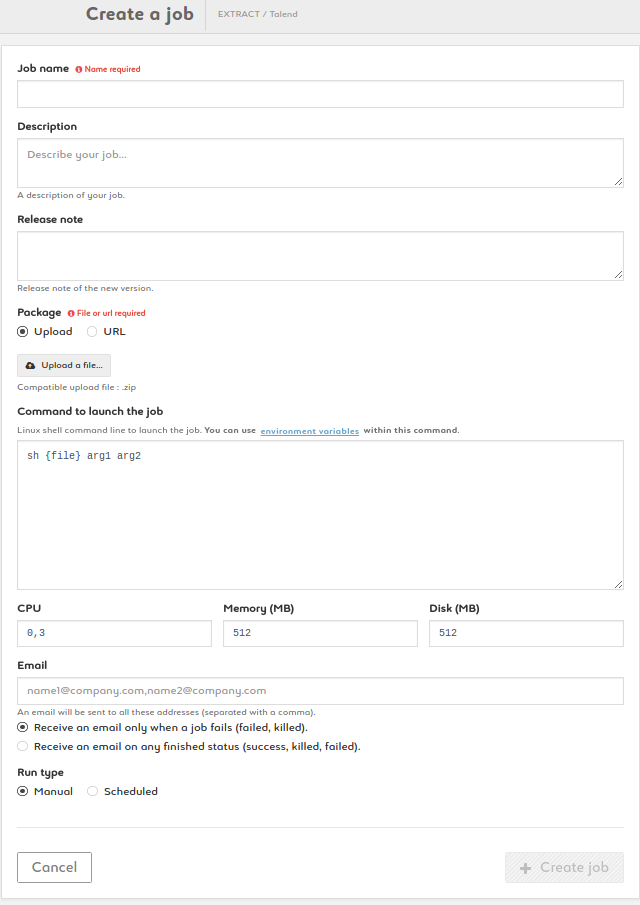
Create a Talend job
1. Name your job, add description and release note
2. Add a package by uploading a zip of by entering a URL
3. Type your command. {file} is a parameter (don't change it). Customize arg1, arg2, etc. Add environmnent variables as $VARIABLE or access your variable library by clicking the link
4. Set your CPU, memory and disk settings
5. Enter one or more e-mail addresses to be alerted and to get the status at the end of the job
6. Run your job manually or set up a schedule
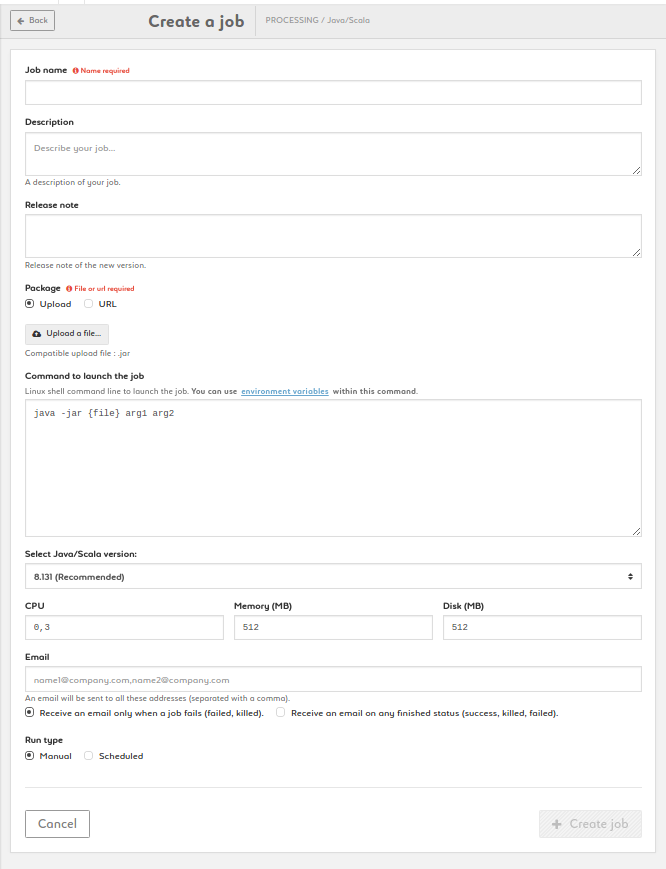
Create a Java/Scala job
1. Name your job, add description and release note
2. Add a package by uploading a jar of by entering a URL
3. Type your command. {file} is a parameter (don't change it). Customize arg1, arg2, etc. Add environmnent variables as $VARIABLE or access your variable library by clicking the link
4. Choose the language version: JAVA 8 (recommended) or JAVA 7
5. Set your CPU, memory and disk settings
6. Enter one or more e-mail addresses to be alerted and to get the status at the end of the job
7. Run your job manually or set up a schedule
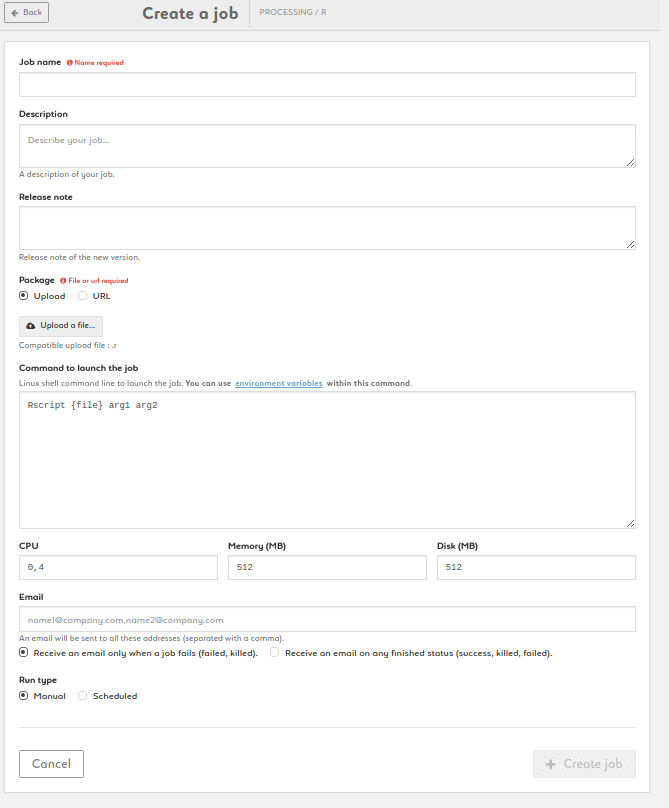
Create a R job
1. Name your job, add description and release note
2. Add a package by uploading a R file of by entering a URL
3. Type your command. {file} is a parameter (don't change it). Customize arg1, arg2, etc. Add environmnent variables as $VARIABLE or access your variable library by clicking the link
4. Set your CPU, memory and disk settings
5. Enter one or more e-mail addresses to be alerted and to get the status at the end of the job
6. Run your job manually or set up a schedule
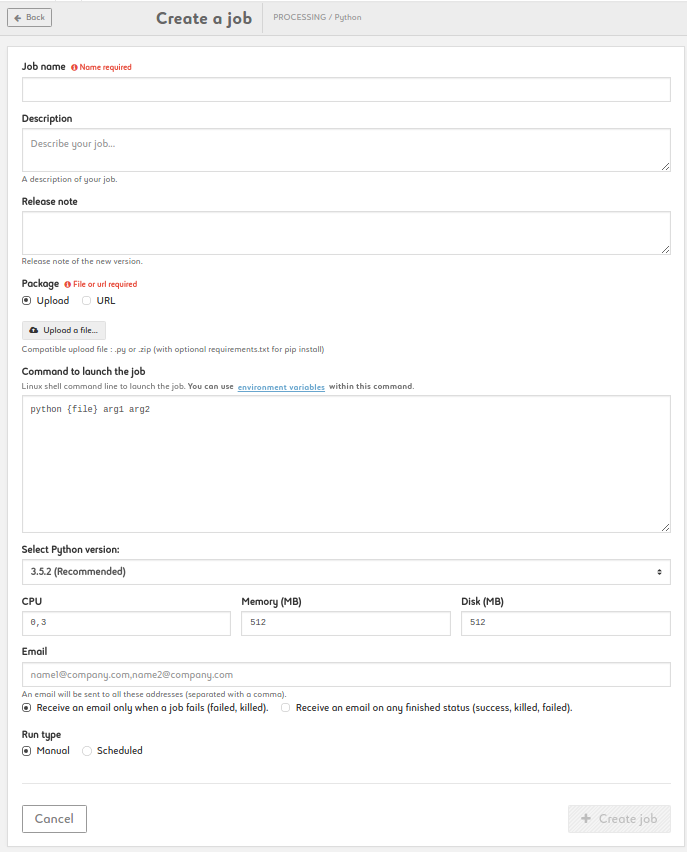
Create a Python job
1. Name your job, add description and release note
2. Add a package by uploading a file of by entering a URL. Files may be a .py or a zip archive with at least a file named __main__.py inside. In zip archives, you can provide a requirements.txt if you need external packages
3. Type your command. {file} is a parameter (don't change it). Customize arg1, arg2, etc. Add environmnent variables as $VARIABLE or access your variable library by clicking the link
4.Select Python version (2.7 or 3.x)
5. Set your CPU, memory and disk settings
6. Enter one or more e-mail addresses to be alerted and to get the status at the end of the job
7. Run your job manually or set up a schedule
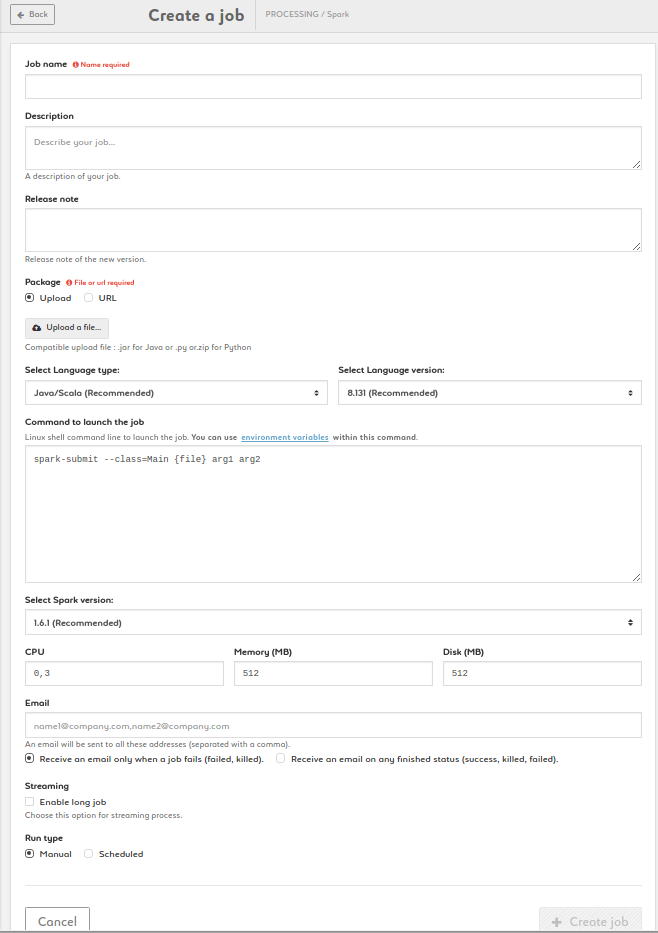
Create a Spark job
1. Name your job, add description and release note
2. Add a package by uploading a jar of by entering a URL
3. Type your command. {file} and {driver_options} are parameters (don't change it). Customize arg1, arg2, etc. Add environmnent variables as $VARIABLE or access your variable library by clicking the link
4. Choose the language type and version between Java/Scala (8.131 recommended or 8.121) and Python (2.5.2 recommended or 2.7.13)
5. Choose the Spark version: 1.6.1 is recommended but 1.5.2 , 2.0.2 and 2.1.0 are also available
6. Set your CPU, memory and disk settings
7. Enter an email address to be alerted if and when the job fails
8. Enable the streaming option in case of streaming process
9. Run your job manually or set up a schedule
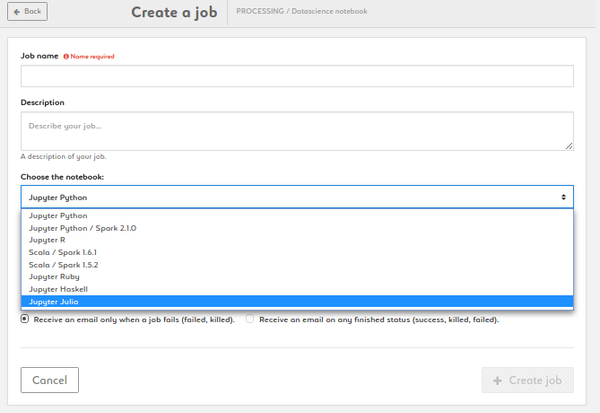
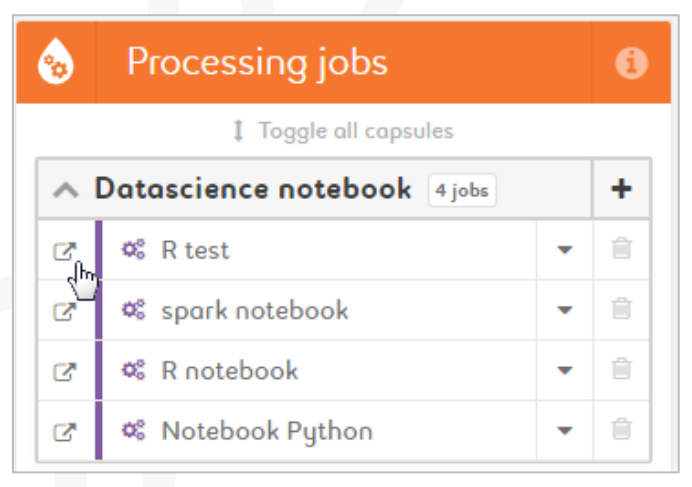
Create a Datascience Notebook
1. Name your job, add description and release note
2. Choose the notebook: Python 2 & 3, Python / Spark 2.1.0 , R, Scala / Spark 1.6.1, Scala / Spark 1.5.2, R, Ruby, Haskell, Julia
3. Set your CPU, memory and disk settings
Access a Datascience Notebook
1. Click on the "Open in new window" icon next to a notebook
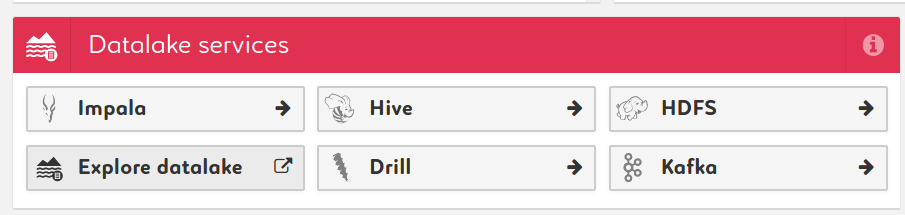
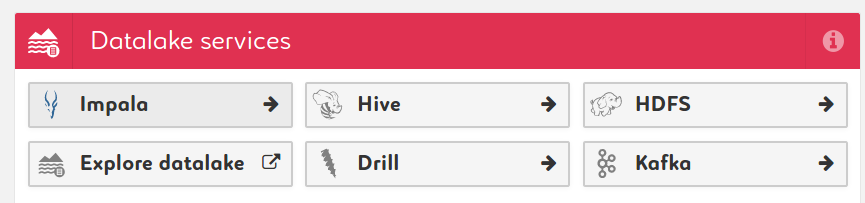
Data Access
Explore your datalake with HUE
1. Click on the "Explore datalake" button in the "Datalake services" module
2. Explore your datalake in the now opened HUE interface
Show connection details
1. Click on any datalake or datamart capsule to display its connection details
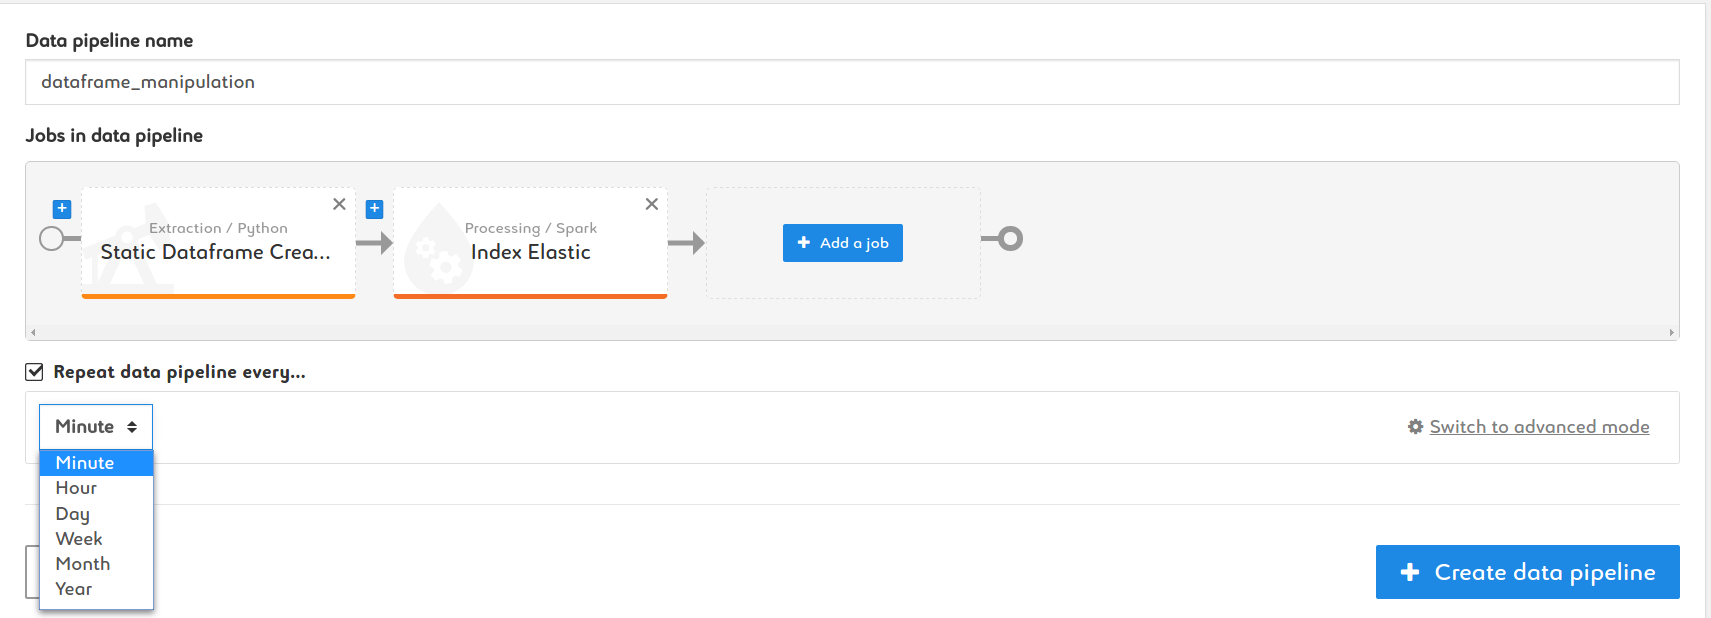
Pipeline Management

1. Name your pipeline
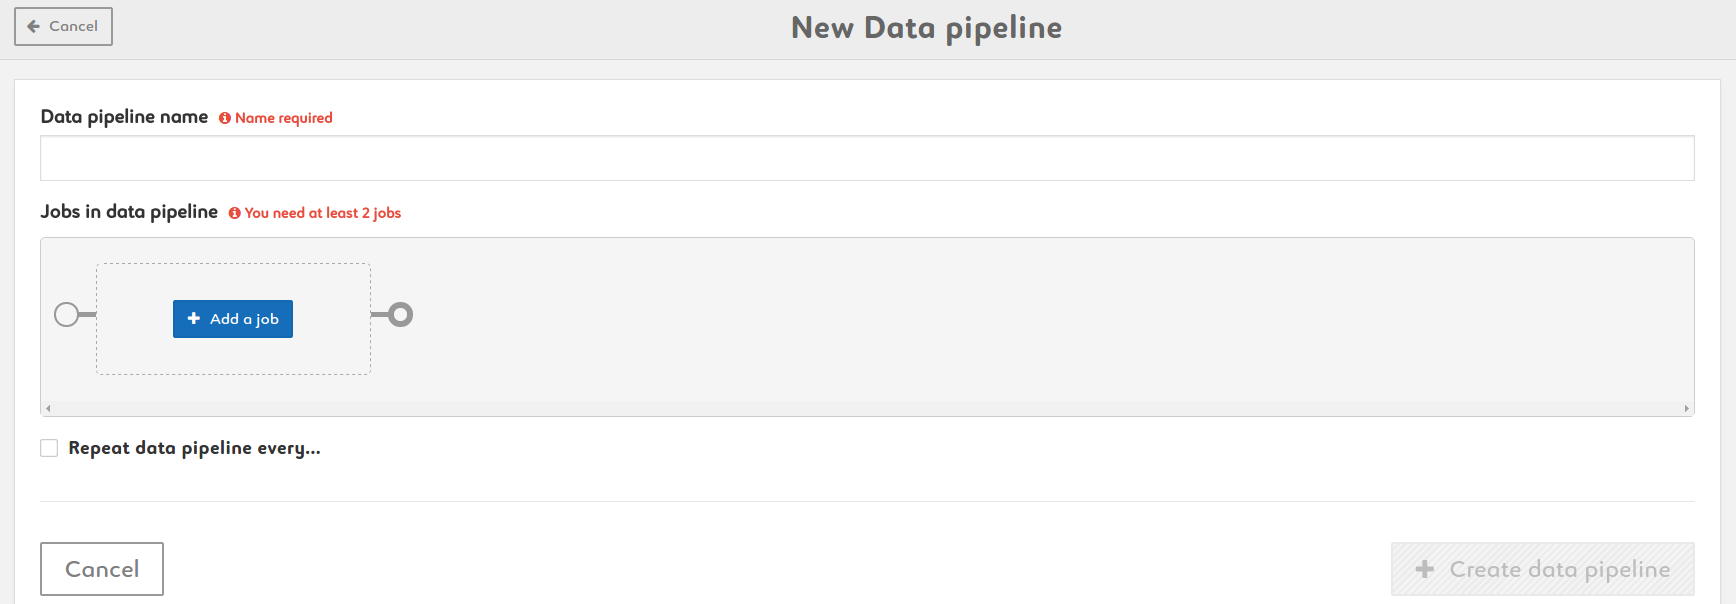
2. Add jobs by searching a job name or choosing in the capsule list

3. Run it manually or set up a schedule